Capture What’s On Your Computer Screen Effortlessly with Our Screenshot Guide!
Taking screenshots of what’s on your computer screen is a fundamental skill. Whether it’s sharing an important web snippet with your digital team or capturing part of your workflow, screenshots can really help get the message across.
This guide is all about that. Here we’ll discuss:
Let’s get started.
How To Take Screenshots On PC

There are a couple of ways of taking screenshots on Windows depending on your preferences. Each differs when it comes to capturing the entire screen or a part of it.
How to Take An Image of Your Entire Screen on PC
Using keyboard shortcuts will capture all visible areas of your screen on a Windows computer. That includes all windows you have open as well as the taskbar.
To do this you simply hit the PrtScn button (usually located in the top right corner of the keyboard). This will copy your screenshot to the clipboard. From there you can then paste (Ctrl+V) the screenshot and modify or share it in whatever way you choose.
A slight variation on this is to hold PrtScn and the Windows Key together. Doing this will then copy your screenshot to the file directory [User]\Pictures\Screenshots. Again, this enables you to easily capture the whole screen.
How to Take An Image of Part of Your Screen on PC
Here you have a few options. Alt+PrtScn (+Fn when on laptops) will capture an image of your active window (the one you’ll see now if you’re reading this in a web browser for example). While Ctrl+PrtScn captures drop down menus (or the features that normally disappear when you hit Alt).
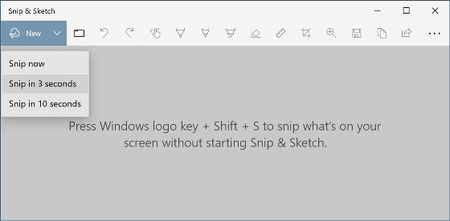
Windows Key+Shift+S, in Windows 10, brings up the “snipping bar”. This enables you to select an area of your screen to capture and save it to the clipboard. You can also annotate, edit and manipulate images directly using this feature too.

How To Take Screenshots On Mac
Taking a screenshot on a Mac is just as straightforward. Again you can select to capture the whole screen instantly, or select a specific part of it when taking your screenshot.
How to Take An Image of Your Entire Screen on Mac
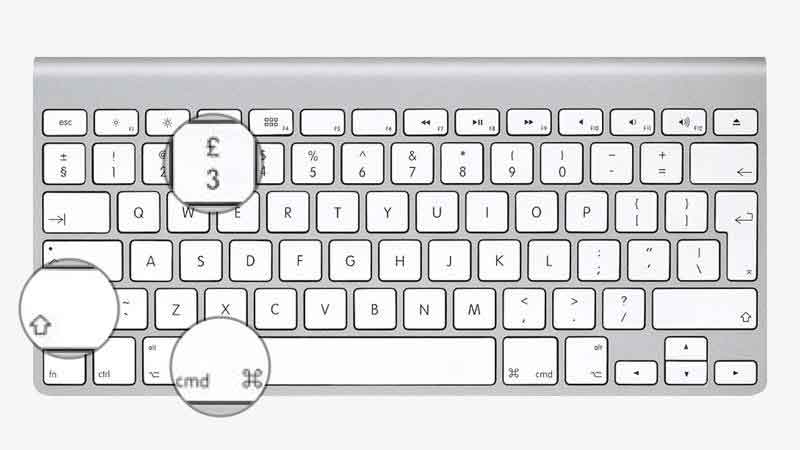
Pressing Cmd+Shift+3 on your Mac should trigger a click sound that will indicate a screenshot has been taken. You’ll also see a thumbnail in the lower right side of your screen too.

Normally this will get saved as a PNG file on your desktop. To save a screenshot directly to the clipboard press Ctrl+Cmd+Shift+3.
How to Take An Image of Part of Your Screen on Mac
You can take an image of any part of your screen by pressing Cmd+Shift+4. Doing this will bring up a crosshair on the screen. You can then click and drag to adjust the area to be captured, highlighting the part of the screen you wish to save in an image file.
Cmd+Shift+4 with the space bar will allow you to capture a specific window, the menu bar or the Dock. You’ll get a camera rather than a crosshair when you do this.
Finally there’s the option of snapping an image of your Mac’s Touch Bar with Cmd+Shift+6.
How to Use Screenshot on Mac
Another nice feature if you’re using Mac is Screenshot. This runs on MacOS Mojave (or later), you can check your operating system’s version by selecting About This Mac from the Apple menu in your screen’s corner.
You can access Screenshot with Cmd+Shift+5 or going to it via Applications > Utilities. Selecting it will make a floating toolbar appear that you can then use to take screenshots or even set a timer.
The screenshots you take using this option get saved directly to your desktop.
How To Take Screenshots On Mobile Devices
As a major part of business communications happens via mobile it’s important to know how to capture a screenshot on your mobile devices too.
While it’s difficult to document all handset manufacturer specific instructions, on Android devices, you can typically take a screenshot by pressing the power and volume down buttons together. Note that on some phones you might need to hold the power button down for a few seconds first.
Previews of your capture usually appear bottom left or at the top of your screen. If this doesn’t work check for alternative guides via your phone’s manufacturer.
The process is similar on the iPhone and iPad. Hold the side and volume up buttons at the same time and then release each after a second or so. If you have sound enabled, you’ll hear a camera click sound effect indicating it has worked. A thumbnail should then appear on the bottom left of your screen previewing the image.
On a TouchID iPhone you need to press the top and home buttons at the same time to do this. You can copy and edit these photos by tapping the preview. They’ll also be saved in the Albums > Screenshots folder of your phone or tablet.
Apps to Capture Screenshots & Screen Recordings
We hope you’ve found the above guides useful.
We have only explained how you can use built in operating system software to take simple screenshots quickly and easily on your devices. If you’re looking for more advanced functionality where screen capture is concerned, no matter whether it’s still images or video footage you want to record, then why not consider looking at some of the premium 3rd party apps currently on the market.
Some of the best screen recording apps on the market currently are:
Please note: We are in no way affiliated with any of the above 3rd party software providers.
Summary
Taking screenshots on your devices needn’t be difficult. Hopefully this quick run down gives you everything you need.
Happy screenshotting!


